Sending and receiving email with IncrediMail
IncrediMail is a fun and easy to use email client that adds spice to the messages you send while protecting you from spam, phishing, and fraud attempts in a convenient manner. Here we will use test@dynu.biz as an example.
Step 1: Add an email account
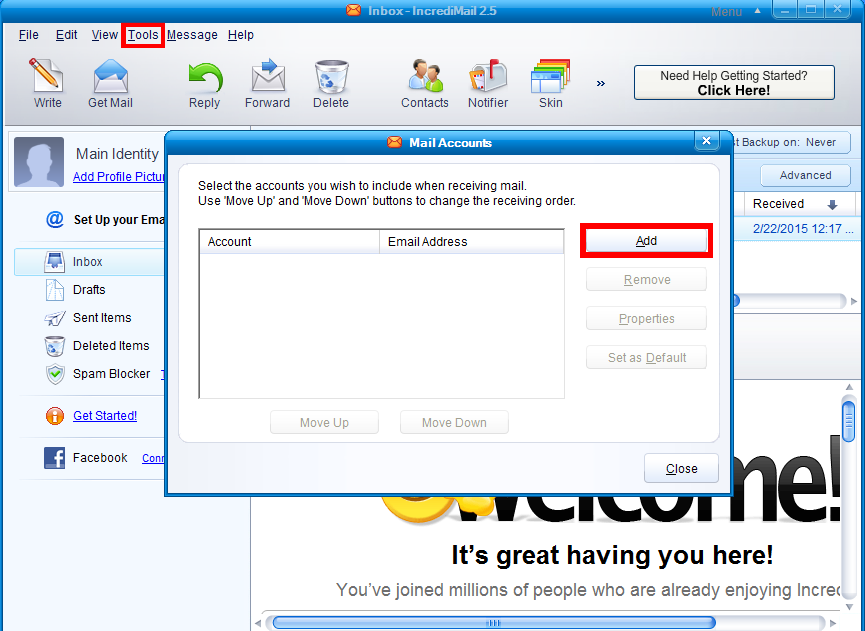
 After opening IncrediMail, click 
        
          "Tools"
        
        on the top of the client interface and choose 
        
          "Email Accounts..".
        Click 
        
          "Add" 
        
        to add an email account.
          After opening IncrediMail, click 
        
          "Tools"
        
        on the top of the client interface and choose 
        
          "Email Accounts..".
        Click 
        
          "Add" 
        
        to add an email account.
         
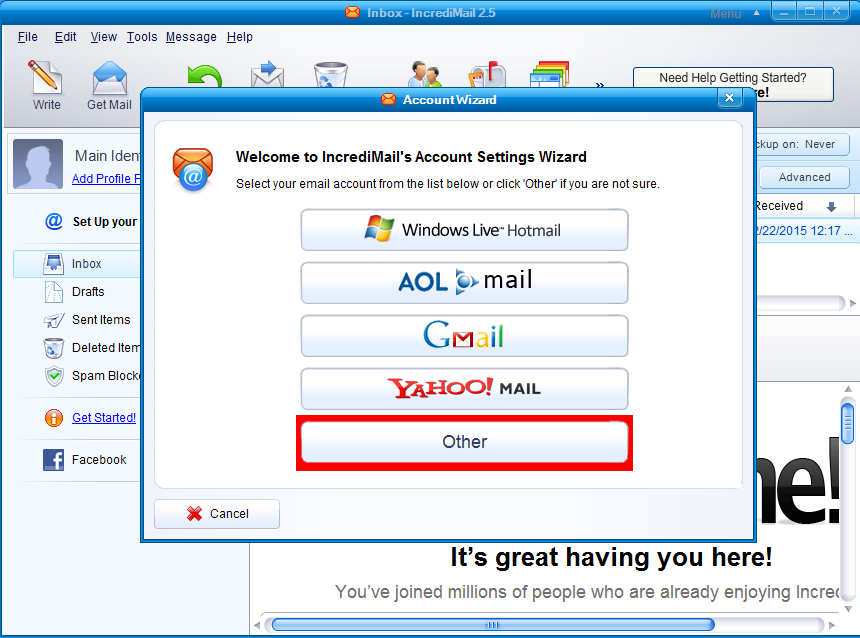
         Choose 
        
          Other
        
        to add email account test@dynu.biz.
          Choose 
        
          Other
        
        to add email account test@dynu.biz. 
         
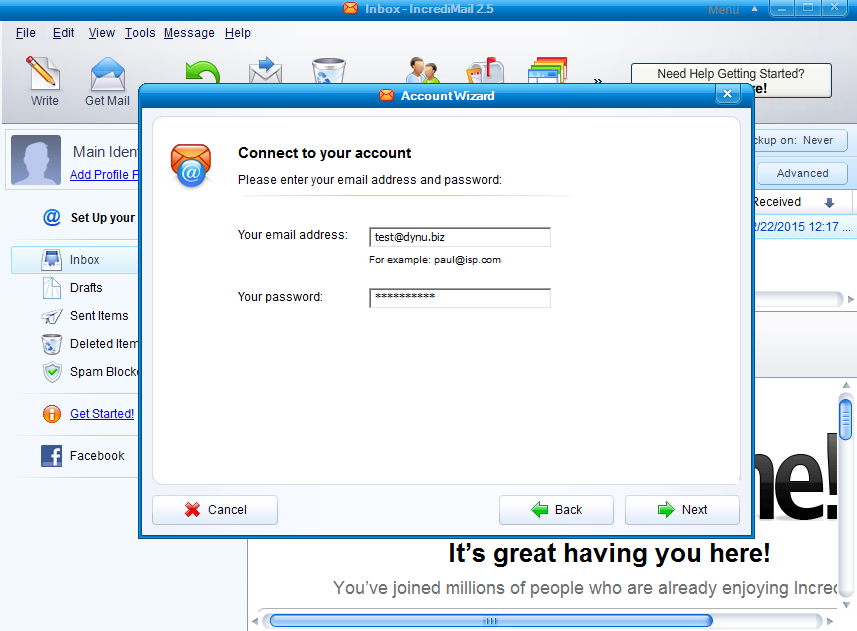
         In the following window, enter your email address and the password you that set up for this account.
          In the following window, enter your email address and the password you that set up for this account.
         
        Step 2: Set up incoming and outgoing mail server
 As you continue, you will see this window asking for incoming and outgoing mail server info. For IMAP account, choose type as
        
          "IMAP"
        
        and use 
        
          yourname-extension-mail.dynu.com
         
        as incoming mail server (in our case, dynu-biz-mail.dynu.com).
          As you continue, you will see this window asking for incoming and outgoing mail server info. For IMAP account, choose type as
        
          "IMAP"
        
        and use 
        
          yourname-extension-mail.dynu.com
         
        as incoming mail server (in our case, dynu-biz-mail.dynu.com). 
         Use 
        
          yourname-extension-smtp.dynu.com
         (in our case, dynu-biz-smtp.dynu.com)
        as outgoing mail server.
           Use 
        
          yourname-extension-smtp.dynu.com
         (in our case, dynu-biz-smtp.dynu.com)
        as outgoing mail server.
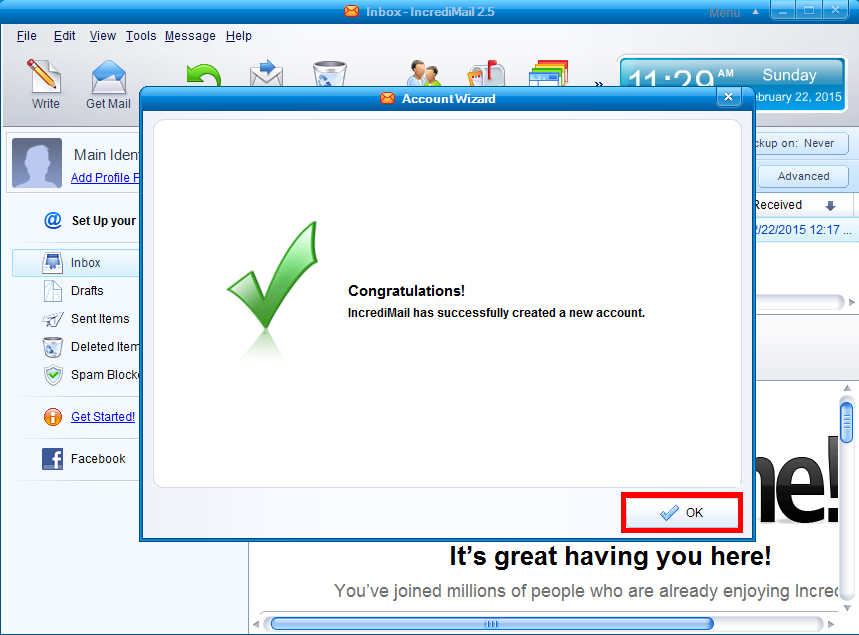
         Click 
        
          Ok
        
        to finish the setup.
          Click 
        
          Ok
        
        to finish the setup.
         
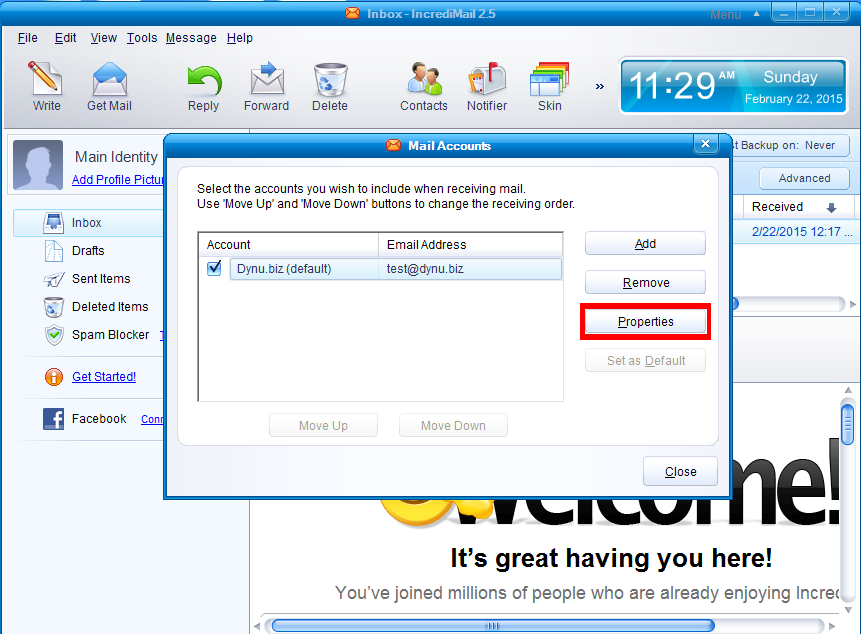
         click 
        
          "Tools"
        
        on the top of the client interface and choose 
        
          "Email Accounts.."
        . You will see the email account that you just
        set up, check that email account and click 
        
          Properties
        
        to configure the account.
          click 
        
          "Tools"
        
        on the top of the client interface and choose 
        
          "Email Accounts.."
        . You will see the email account that you just
        set up, check that email account and click 
        
          Properties
        
        to configure the account.
         
         In "Servers" tab, make sure that the incoming server address is 
        
          yourname-extension-mail.dynu.com
        
        and the outgoing mail server address is 
        
          yourname-extension-smtp.dynu.com. Enter your full email address as username for the incoming
        mail server, and the password for the email account.
          In "Servers" tab, make sure that the incoming server address is 
        
          yourname-extension-mail.dynu.com
        
        and the outgoing mail server address is 
        
          yourname-extension-smtp.dynu.com. Enter your full email address as username for the incoming
        mail server, and the password for the email account.
         For outgoing mail server, check "My server requires authentication" and click on 
        
          More settings
        
        to configure the outgoing mail server.
        For outgoing mail server, check "My server requires authentication" and click on 
        
          More settings
        
        to configure the outgoing mail server.
         In this step, we need to enter login information for outgoing mail server 
        
          yourname-extension-smtp.dynu.com. Enter the full email
        address and username and the password for the email account.
          In this step, we need to enter login information for outgoing mail server 
        
          yourname-extension-smtp.dynu.com. Enter the full email
        address and username and the password for the email account.
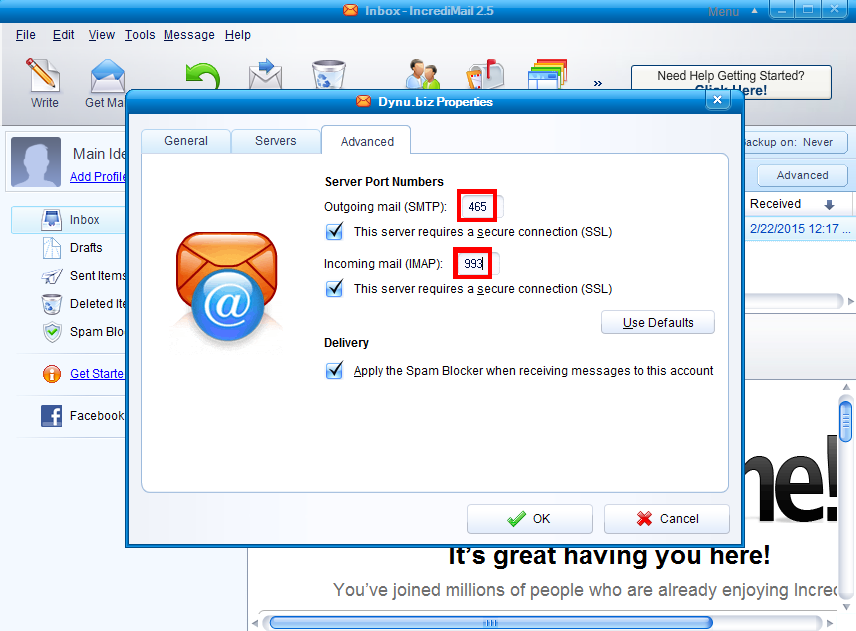
         Use 
        
          SMTP SSL port 465
        
        for outgoing mail server port and 
        
          IMAP SSL port 993
        
        for incoming mail server port.
          Use 
        
          SMTP SSL port 465
        
        for outgoing mail server port and 
        
          IMAP SSL port 993
        
        for incoming mail server port.
         
         Check the setting one more time and click 
        
          Ok
        
        to save the settings.
          Check the setting one more time and click 
        
          Ok
        
        to save the settings.
        Now we will be able to send and receive email using test@dynu.biz.
NOTE: If you are using POP3 protocol, please change the incoming server address to yourname-extension-mail.dynu.com, and POP SSL port 995. If you are using non SSL port, please refer here for port information.


  IncrediMail
 IncrediMail